Instructions

frigidaire lp conversion kit instructions

Frigidaire LP conversion kit instructions provide guidance on converting gas ranges to LP gas, ensuring safe and proper installation with clear step-by-step procedures always.

Understanding the Importance of Conversion Kits

Conversion kits play a crucial role in enabling gas ranges to operate with different types of fuel, such as LP gas, which is commonly used in areas where natural gas is not available; The Frigidaire LP conversion kit is designed to facilitate this process, ensuring a safe and efficient transition. By using a conversion kit, users can adapt their gas ranges to run on LP gas, which is often more convenient and cost-effective. This is particularly important for individuals living in rural areas or those who prefer to use LP gas for their cooking needs. The conversion kit includes necessary components, such as orifices and instructions, to complete the conversion process, making it a vital component for gas range owners who want to switch to LP gas. The kit is easy to install and use, making it a practical solution for many users.

Overview of Frigidaire LP Conversion Kit

Frigidaire LP conversion kit includes components for safe conversion to LP gas with easy installation procedures always available online.

Kit Components and Compatibility

The Frigidaire LP conversion kit includes various components such as orifices, regulators, and valves, designed to ensure a safe and proper conversion to LP gas. The kit is compatible with specific Frigidaire gas range models, including those with the prefixes FC, GC, and PC. It is essential to verify the compatibility of the kit with the specific gas range model to ensure a successful conversion. The kit components are designed to work together to provide a reliable and efficient conversion to LP gas. The kit also includes instructions and guidelines for installation, which must be followed carefully to ensure a safe and proper conversion. The compatibility of the kit with the gas range model is crucial to ensure a successful conversion and to prevent any potential safety hazards. The kit is designed to meet the specific needs of Frigidaire gas range owners who require a conversion to LP gas.

Pre-Installation Checklist

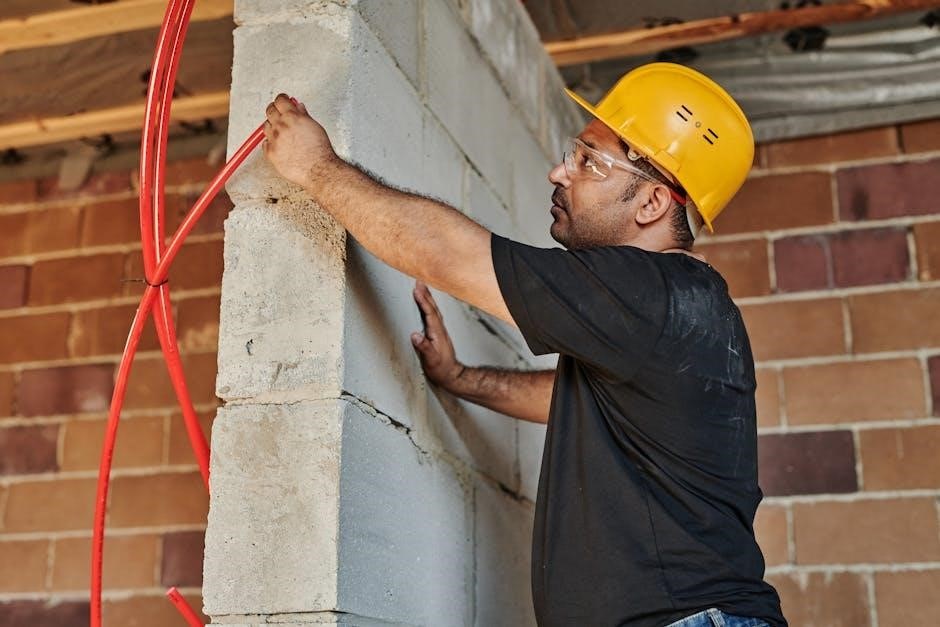
Review the manual and gather necessary tools and materials before starting the installation process always.

Reviewing Instructions and Safety Precautions

It is essential to carefully review the instructions and safety precautions provided with the Frigidaire LP conversion kit to ensure a safe and successful installation. The manual should be read thoroughly, and all warnings and cautions should be noted. The installer should also be familiar with the local gas codes and regulations. A gas leak detector fluid or soapy water should be used to check for leaks after installation. The range should be plugged in and the gas supply turned on to test for leaks. By following the instructions and taking the necessary safety precautions, the risk of accidents and injuries can be minimized, and the installation can be completed efficiently and effectively, resulting in a safe and properly functioning gas range. The instructions should be followed carefully to avoid any mistakes.

Installation Process for Frigidaire LP Conversion Kit

Installation involves replacing orifices and regulators with LP conversion kit components always carefully.

Step-by-Step Guide to Converting to LP Gas

A step-by-step guide to converting to LP gas involves careful planning and execution, starting with gathering the necessary tools and components, including the Frigidaire LP conversion kit. The kit usually includes instructions and replacement parts, such as orifices and regulators. It is essential to follow the manufacturer’s instructions and take safety precautions to avoid accidents. The process typically begins with shutting off the gas supply and disconnecting the range from the power source. Then, the user must locate the gas valves and orifices, which need to be replaced with the LP conversion kit components. The user should also inspect the gas lines and connections for any signs of damage or wear. By following the step-by-step guide, users can ensure a safe and successful conversion to LP gas. The guide is usually provided with the conversion kit and is specific to the Frigidaire model.

Troubleshooting Common Issues

Troubleshooting involves identifying and resolving issues like leaks and incorrect installations with Frigidaire LP conversion kits always following instructions carefully online.

Identifying and Resolving Leaks and Other Problems

To identify leaks, use a gas leak detector fluid or soapy water to coat valves, joints, and hoses, then check for bubbles, following the Frigidaire LP conversion kit instructions carefully.
The kit includes a manual with troubleshooting tips and guides for resolving common issues, such as incorrect installations or faulty components.
By following these steps, you can ensure safe and proper operation of your gas range, and resolve any problems that may arise during or after the conversion process, always referring to the instructions and manufacturer’s guidelines for guidance and support, using online resources and customer support services if needed, to complete the conversion successfully and safely.

Post-Installation Checks and Tests

Verify the Frigidaire range is operating safely with LP gas after installation and testing procedures are completed successfully always.

Verifying Safe Operation and Performance

To ensure the Frigidaire range is operating safely and efficiently, verify that all connections are secure and leak-free using a gas leak detector fluid or soapy water. Check the range’s burners and igniters to ensure they are functioning properly and producing a stable flame. Additionally, review the range’s performance and adjust the burner orifices as needed to achieve optimal flame characteristics. It is also important to consult the user manual and follow the manufacturer’s instructions for testing and verifying the range’s safe operation. By following these steps, you can ensure that your Frigidaire range is operating safely and efficiently on LP gas, and provide a safe cooking environment for you and your family. The verification process is crucial to prevent any potential hazards or performance issues. Proper verification ensures optimal range performance always and safely.

and Final Thoughts

Frigidaire LP conversion kit instructions are essential for successful installation with proper safety precautions always in place and followed correctly online.

Importance of Following Instructions and Safety Guidelines

The importance of following instructions and safety guidelines when installing a Frigidaire LP conversion kit cannot be overstated, as it ensures a safe and successful installation process with minimal risks. By carefully reading and adhering to the instructions provided, individuals can avoid common mistakes and potential hazards, such as gas leaks or improper connections. The instructions typically include a list of necessary tools and materials, as well as step-by-step procedures for completing the conversion. Additionally, the safety guidelines outline important precautions to take during the installation process, such as turning off the gas supply and ensuring proper ventilation. Following these guidelines is crucial to preventing accidents and ensuring the safe operation of the gas range. Overall, careful attention to instructions and safety guidelines is essential for a successful and safe Frigidaire LP conversion kit installation, and should always be prioritized.

Instructions

gas wall heater installation instructions

Importance of Proper Installation

Proper installation of a gas wall heater is crucial for safe and efficient operation. A correct installation ensures that the heater functions as intended‚ providing warmth and comfort to the space. It also helps to prevent potential hazards such as gas leaks‚ fires‚ and explosions. The use of proper materials and techniques‚ such as sealing all connections with orange thread tape‚ is essential to prevent leaks and ensure safe operation. A proper installation also helps to maintain the heater’s performance and longevity‚ reducing the need for repairs and maintenance. Additionally‚ a correct installation is required to meet local building codes and regulations‚ and to ensure that the heater is installed in accordance with the manufacturer’s instructions. By following the proper installation procedures‚ homeowners can enjoy a safe and reliable source of heat‚ and avoid potential risks and hazards associated with improper installation. This is very important to consider.

Pre-Installation Requirements

Checking local building codes and regulations is necessary before installing a gas wall heater to ensure compliance and safety always using proper materials and techniques correctly.

Checking Gas Service Availability

To ensure a successful gas wall heater installation‚ it is crucial to check the availability of gas service in your area‚ as this will determine the type of heater you can install.
You should contact your local gas company to inquire about the availability of natural gas or propane in your area.
They will be able to provide you with information on the types of gas services available‚ as well as any specific requirements or regulations that must be followed.
Additionally‚ you should also check the location of the gas meter and the route of the gas line to ensure that it is safe and accessible.
By checking the gas service availability‚ you can ensure that your gas wall heater is installed correctly and safely‚ and that it will provide you with efficient and reliable heating for years to come.
This step is essential in the installation process and should not be overlooked.

Choosing the Right Gas Wall Heater

Consider heat output‚ size‚ and cabinet style when selecting a gas wall heater for your space and needs always correctly.

Considerations for Heat Output and Size

When choosing a gas wall heater‚ considerations for heat output and size are crucial to ensure efficient heating. The heat output of a gas wall heater is measured in British Thermal Units (BTUs) per hour‚ ranging from 3‚000 to 30‚000 BTUs. The size of the heater also plays a significant role in determining its heat output. A larger heater will generally produce more heat‚ but it may not be suitable for smaller spaces. It is essential to calculate the required heat output based on the size of the room and the level of insulation to select the right gas wall heater. Additionally‚ the heater’s size and design should also be considered to ensure it fits comfortably in the desired location and does not obstruct the surrounding area. Proper sizing and heat output are critical to achieve optimal heating performance and energy efficiency.

Understanding Vent-Free Gas Space Heaters

Vent-free gas space heaters provide safe and efficient heating solutions with sealed burn systems and safety pilots for various room sizes and applications always using natural gas sources correctly.

Available Cabinet Sizes and Colors

Vent-free gas space heaters are available in several cabinet sizes‚ ranging from compact units to fireplace-like models‚ to fit different room sizes and decor.
The colors available for these heaters are typically limited to ivory or brown‚ although some models may feature a faux wood-grain finish‚ adding a touch of elegance to the room.
The various cabinet sizes and colors allow homeowners to choose a heater that complements their existing furniture and design style‚ making it easy to incorporate the heater into the room’s aesthetic.
Additionally‚ the range of sizes and colors provides flexibility in terms of placement and installation‚ allowing the heater to be mounted on a wall or placed in a corner‚ depending on the specific model and design.
Overall‚ the available cabinet sizes and colors for vent-free gas space heaters offer a convenient and stylish heating solution for homeowners.

Installation Process Overview

Installation involves several key steps and considerations for safe operation always using proper materials and following guidelines correctly every time with necessary tools.

Connecting the Gas Line and Heater

To connect the gas line and heater‚ use orange thread tape or sealant at all connections to prevent leaks‚ ensuring a secure and safe installation process.
The LP gas inlet is typically located on the bottom corner of the heater‚ and a brass nipple can be used to connect from the reducer.
It is essential to follow the manufacturer’s instructions and use the correct materials‚ such as black iron pipe‚ to complete the connection.
Proper connection of the gas line and heater is critical to prevent any potential hazards‚ such as gas leaks or explosions.
By following the correct procedures and using the right materials‚ a safe and efficient connection can be achieved‚ allowing for proper operation of the gas wall heater.
The connection process requires attention to detail and adherence to safety guidelines to ensure a successful installation.
Using the correct tools and materials‚ the connection can be made securely and safely‚ providing a reliable source of heat.

Safety Features and Considerations

Safety pilot with built-in pressure regulator stops gas flow if pilot is extinguished‚ ensuring safe operation always with proper installation and maintenance procedures in place correctly.

Preventing Leaks and Ensuring Safe Operation

To prevent leaks and ensure safe operation‚ it is crucial to use proper materials and follow installation guidelines. Orange thread tape or sealant should be applied to all connections to prevent gas leaks. Propane is highly explosive if not handled correctly‚ so it is essential to take necessary precautions. A sealed burn system is also recommended‚ as it provides a safe and efficient way to burn fuel. Additionally‚ a safety pilot with a built-in pressure regulator can stop the flow of gas if the pilot is extinguished‚ ensuring safe operation. By following these guidelines and using the right materials‚ you can prevent leaks and ensure safe operation of your gas wall heater. Regular maintenance is also necessary to ensure the heater continues to operate safely and efficiently. This includes checking for leaks and inspecting the heater and its components regularly.

Hiring a Professional for Gas Work

Hiring a professional plumber is recommended for gas work to ensure safety and compliance with regulations and codes always and correctly during installation processes.

Recommendations for DIY Installation Limitations

When considering DIY installation of a gas wall heater‚ it is essential to understand the limitations and potential risks involved. According to various sources‚ DIY installation can be challenging and may not be suitable for everyone‚ especially those without prior experience with gas work. The complexity of the installation process‚ including the need to connect gas lines and ensure proper ventilation‚ can be overwhelming for some individuals. Furthermore‚ DIY installation may void the manufacturer’s warranty or violate local building codes. It is recommended that homeowners carefully evaluate their abilities and consider hiring a professional if they are unsure about any aspect of the installation process. By doing so‚ they can ensure a safe and successful installation that meets all necessary standards and regulations‚ and provides reliable and efficient heating for their home. Proper installation is crucial to prevent accidents and ensure safe operation.

Instructions

mandatory instruction sign

Mandatory instruction signs are crucial for air traffic control, providing

critical information

to pilots, ensuring safe navigation and compliance with regulations, using a standardized color scheme and design to convey important messages effectively always.

Definition and Purpose

Mandatory instruction signs are defined as signs that provide critical information to pilots and airport personnel, indicating locations where aircraft may not proceed without authorization. The purpose of these signs is to ensure safe navigation and compliance with regulations, preventing potential hazards and accidents.

They are designed to be easily recognizable and understandable, using a standardized color scheme and design to convey important messages effectively. The definition and purpose of mandatory instruction signs are closely related to their role in maintaining airport safety and efficiency.

By providing clear and concise instructions, these signs help to prevent misunderstandings and errors, reducing the risk of accidents and incidents. Overall, the definition and purpose of mandatory instruction signs are essential components of airport safety and operations, playing a critical role in ensuring the safe and efficient movement of aircraft and personnel.

Characteristics of Mandatory Instruction Signs

Mandatory signs have distinct features including color and design elements always visible to pilots and personnel for safe navigation purposes only using standard colors.

Color and Design

Mandatory instruction signs have a distinctive color scheme, with white inscriptions on a red background, making them easily recognizable to pilots and airport personnel. The design of these signs is standardized to ensure clarity and consistency, allowing for quick comprehension of the information being conveyed. The use of a red background with white text provides high visibility, even in low-light conditions, and helps to grab the attention of pilots and drivers. The design elements of mandatory instruction signs are carefully considered to ensure that they are simple, yet effective, in communicating critical information. The standardization of color and design helps to reduce confusion and ensures that pilots and personnel can quickly understand the instructions being provided. By using a consistent design and color scheme, mandatory instruction signs play a crucial role in maintaining safety and efficiency in airport operations. The design and color of these signs are essential components of a safe and well-organized airport environment.

Types of Mandatory Instruction Signs

Various signs exist, including runway designation, holding position, and no entry signs, providing crucial instructions to pilots and personnel, using standardized colors and designs to convey important messages effectively always.

Runway Designation Signs

Runway designation signs are a type of mandatory instruction sign that provides critical information to pilots, indicating the designation of the runway they are approaching or currently on. These signs are typically located at the intersection of runways and taxiways, and are designed to be easily visible to pilots from a distance. The inscription on a runway designation sign consists of the runway designations of the intersecting runway, properly oriented with respect to the viewing position of the sign. This information is essential for pilots to ensure they are on the correct runway and to prevent potential collisions or other safety hazards. By providing clear and concise information, runway designation signs play a vital role in maintaining safe and efficient air traffic operations. They are an essential component of the airport’s visual guidance system, and are used in conjunction with other signs and markings to guide pilots through the airport.

Locations of Mandatory Instruction Signs

Mandatory instruction signs are located at runway holding points on both sides of the taxiway, providing critical guidance to pilots, using standardized signs and markings always effectively.

Runway Holding Points

Mandatory instruction signs are positioned at runway holding points to prevent aircraft from entering the runway without clearance. These signs are typically located on both sides of the taxiway, providing clear guidance to pilots. The signs are designed to be highly visible, with a standardized color scheme and design to convey important messages effectively. At uncontrolled airports, pilots must take appropriate precautions before proceeding, as there is no air traffic control to provide clearance. The signs are an essential part of air traffic control, ensuring safe navigation and compliance with regulations. By following the instructions on these signs, pilots can help prevent accidents and ensure a safe takeoff and landing. The signs are also used to mark areas where aircraft are not allowed to enter at all, providing an additional layer of safety and security. Overall, mandatory instruction signs at runway holding points play a critical role in maintaining aviation safety.

Importance of Mandatory Instruction Signs

Mandatory signs ensure aviation safety, preventing accidents and regulating air traffic, using standardized colors and designs to convey critical information to pilots, always effectively and clearly in the English language everywhere.

Safety Precautions

Mandatory instruction signs play a crucial role in ensuring safety precautions are taken by pilots and air traffic controllers. The signs provide critical information to prevent accidents and regulate air traffic.

According to regulations, mandatory instruction signs must be clearly visible and easily understandable to prevent misinterpretation.

The signs are designed to provide safety precautions, such as warning pilots of potential hazards or restricting access to certain areas of the airport.

By following the instructions on these signs, pilots can ensure a safe and successful flight, and air traffic controllers can effectively manage air traffic.

Overall, mandatory instruction signs are an essential component of airport safety, and their importance cannot be overstated.

Their role in preventing accidents and ensuring the safe operation of aircraft is critical, and they must be strictly adhered to by all pilots and air traffic controllers.

Instructions

tie dye tulip instructions

Discover the art of tie dye with Tulip instructions, a fun and creative way to design unique fabrics using

colorful dyes

and simple techniques, perfect for beginners and experts alike always;

Overview of Tie Dye Process

The tie dye process involves folding, twisting, or pleating fabric to create resistance areas where the dye cannot penetrate, resulting in unique and interesting patterns. This technique allows for a wide range of creativity and experimentation with different folds and dye applications. The process typically starts with pre-washing the fabric to remove any finishes that may affect the dye, followed by folding or binding the fabric to create the desired pattern. The folded fabric is then immersed in the dye, allowing the colors to penetrate and set. The tie dye process can be used to create a variety of effects, from subtle, muted colors to vibrant, bold patterns. With the right techniques and materials, anyone can create their own unique tie dye designs using Tulip instructions and products. The process is relatively simple and requires minimal equipment, making it accessible to crafters of all skill levels. Overall, the tie dye process is a fun and creative way to add color and interest to fabric.

Importance of Following Instructions

Following the instructions provided with Tulip tie dye products is crucial to achieving the desired results. The instructions outline the necessary steps to prepare the fabric, mix the dyes, and apply the colors to ensure a successful tie dye project. By following the instructions, crafters can avoid common mistakes that can lead to uneven color distribution, faded colors, or damaged fabric. The instructions also provide important safety precautions to prevent accidents and ensure a safe working environment. Additionally, following the instructions can help crafters to achieve consistent results and reproduce their designs with ease. Using the right materials and following the instructions can also help to prevent waste and reduce the environmental impact of the tie dye process. Overall, following the instructions is essential to achieving professional-looking results and enjoying a successful tie dye experience with Tulip products and instructions. Proper instruction following is key to a fun and creative project.

Preparation for Tie Dye

Begin with

essential materials

and follow simple steps to prepare for a fun tie dye experience always using Tulip instructions.

Pre-Washing Fabric

To ensure the best results for your tie dye project, it is crucial to pre-wash the fabric before starting the dyeing process. This step helps remove any finishes or impurities that may affect the dye. Using a mild detergent, wash the fabric in warm water and let it dry completely. This preparation step is essential for achieving vibrant and even colors. By pre-washing the fabric, you can guarantee that your tie dye project will turn out as expected. It is also important to note that some fabrics may require special care, so be sure to check the fabric’s instructions before pre-washing. Additionally, pre-washing helps to shrink the fabric, preventing any further shrinkage during the dyeing process. Following this step will ensure that your fabric is ready for the tie dye process, and you can move on to the next step with confidence. Proper preparation is key to a successful tie dye project.

Securing Fabric with Rubber Bands

Securing the fabric with rubber bands is a critical step in the tie dye process. This technique allows you to create unique and interesting patterns on your fabric. To start, fold, twist, or pleat the fabric into the desired shape, and then wrap rubber bands around the folded areas to hold them in place. The rubber bands will resist the dye, creating distinctive patterns and shapes on the fabric. You can use single or multiple rubber bands, depending on the design you want to achieve. It’s also important to make sure the rubber bands are tight enough to prevent the dye from seeping under them. By securing the fabric with rubber bands, you can create a wide range of designs, from simple to complex, and add an extra layer of creativity to your tie dye project. This step requires some patience and experimentation, but the results are well worth the effort. Properly securing the fabric is essential for achieving the desired pattern.

Applying Tulip One-Step Dyes

Mix Tulip dyes according to instructions and apply to fabric for vibrant colors and unique designs always with easy steps and techniques.

Mixing Dye Colors

To achieve unique and vibrant colors, mixing dye colors is a crucial step in the tie dye process. According to the instructions provided, Tulip One-Step Dyes can be mixed to create a wide range of colors and shades. The key is to follow the instructions carefully and experiment with different color combinations. By mixing different dye colors, you can create intricate and interesting designs on your fabric. It is also important to note that the ratio of dye to water can affect the final color outcome. With a little practice and patience, you can master the art of mixing dye colors and create stunning tie dye designs. The possibilities are endless, and with Tulip One-Step Dyes, you can unleash your creativity and produce truly unique and colorful fabrics. By following the instructions and using your imagination, you can create beautiful and vibrant tie dye designs that will stand out from the crowd.

Applying Dye to Fabric

Applying dye to fabric is a critical step in the tie dye process, requiring attention to detail and careful execution. According to the Tulip instructions, the dye should be applied to the fabric in a specific manner to achieve the desired design. The fabric should be folded, twisted, or pleated to create resistance areas where the dye cannot penetrate, resulting in unique and interesting patterns. The dye can be applied using a variety of techniques, including squirting, brushing, or soaking. It is essential to wear protective gloves and work in a well-ventilated area to avoid skin and eye irritation. The fabric should be completely covered with the dye to ensure even color distribution. By following the instructions and taking necessary precautions, you can achieve professional-looking results and create beautiful tie dye designs. The application of dye to fabric is a fun and creative process that requires patience and practice to master. With Tulip One-Step Dyes, you can create stunning tie dye designs that will add a personal touch to your clothing and accessories.

Tie Dye Techniques

Explore various

tie dye methods

and styles, including folding, twisting, and binding, to create unique designs and patterns with Tulip dyes always using simple and easy techniques online.

Crumple Tie-Dye Technique

The crumple tie-dye technique is a popular method used to create unique and interesting designs on fabric using Tulip dyes. This technique involves crumpling the fabric into a tight ball and securing it with rubber bands, allowing the dye to penetrate the fabric in a random and unpredictable way. To achieve this technique, start by pre-washing the fabric to remove any finishes that may affect the dye. Then, crumple the fabric into a ball and secure it with rubber bands, making sure to apply even pressure to the fabric. Next, mix the Tulip dyes according to the instructions and apply them to the crumpled fabric, making sure to saturate the fabric evenly. The result is a beautiful, one-of-a-kind design that is perfect for clothing, accessories, and home decor items. With the crumple tie-dye technique, the possibilities are endless, and the results are always unique and exciting. Using this technique with Tulip dyes is easy and fun, and the results are always worth the effort.

Immersion Tie-Dye Technique

The immersion tie-dye technique is a versatile method that involves submerging the fabric in a dye bath to achieve a range of colors and effects. This technique allows for a great deal of control over the final result, as the fabric can be manipulated and folded to create unique patterns and designs. To use the immersion technique with Tulip dyes, start by mixing the dyes according to the instructions and preparing the fabric by pre-washing and removing any excess water. Then, submerge the fabric in the dye bath, making sure that it is fully covered by the dye. The length of time the fabric is left in the dye bath will affect the final color, with longer immersion times resulting in deeper, richer colors. The immersion tie-dye technique is a great way to create beautiful, professional-looking results with Tulip dyes, and can be used to create a wide range of unique and interesting designs. This technique is perfect for those looking to create intricate and detailed patterns on their fabric.

and Tips

Instructions

relyx luting cement instructions

RelyX Luting Cement is introduced as a resin-modified glass ionomer cement for routine cementation‚ offering molecular bonding to tooth surface without separate tooth conditioner‚ in a 1:1 scoop:drop ratio‚ easily mixed.

General Information

RelyX Luting Cement is a type of dental cement used for various restorative procedures‚ including the cementation of crowns‚ bridges‚ and inlays/onlays. The cement is available in a powder and liquid form‚ which are mixed together in a 1:1 ratio. This mixture is then loaded into the restoration and seated‚ allowing for excess cement to be cleaned up. RelyX Luting Cement is known for its ability to bond to tooth structure‚ as well as its fluoride-releasing properties. It is also radiopaque‚ making it visible on radiographs. The cement is widely used in dental practices due to its ease of use and reliable results. Additionally‚ RelyX Luting Cement is compatible with a variety of restorative materials‚ including metal‚ ceramic‚ and composite resins. Overall‚ RelyX Luting Cement is a versatile and effective dental cement that can be used in a range of clinical situations.

Key Features

RelyX Luting Cement has several key features that make it a popular choice among dentists. One of its main features is its ability to provide molecular bonding to the tooth surface without the need for a separate tooth conditioner. The cement also has a low viscosity‚ making it easy to mix and load into the restoration. Additionally‚ RelyX Luting Cement is self-curing‚ which means it can be used in a variety of clinical situations. The cement is also radiopaque‚ making it visible on radiographs‚ and it releases fluoride‚ which can help to prevent decay. Another key feature of RelyX Luting Cement is its ease of use‚ with a simple 1:1 scoop:drop ratio and a short mixing time of 30 seconds. Overall‚ the key features of RelyX Luting Cement make it a reliable and effective choice for dental cementation procedures‚ providing a strong and lasting bond between the tooth and restoration. Its unique properties make it an ideal choice for many dental applications.

Benefits of RelyX Luting Cement

RelyX Luting Cement offers advantages including molecular bonding and fluoride release‚ making it a valuable dental tool with many benefits for patients and dentists alike always.

Advantages Over Other Cements

RelyX Luting Cement has several advantages over other cements‚ including its ability to bond to tooth structure and restorative substrates without the need for a separate tooth conditioner.
This makes it a more convenient and efficient option for dentists‚ as it saves time and reduces the number of steps required for the cementation process.
Additionally‚ RelyX Luting Cement has improved strength properties and low solubility‚ making it a more durable and long-lasting option compared to other cements.
The cement also releases fluoride ions‚ which can help to prevent decay and promote oral health.
Overall‚ the advantages of RelyX Luting Cement make it a popular choice among dentists for a variety of cementation applications.
Its unique combination of properties and benefits makes it an ideal option for those looking for a reliable and effective cement.
RelyX Luting Cement is a valuable tool in the field of dentistry‚ offering many advantages over other cements.

Convenience and Ease of Use

RelyX Luting Cement is designed to be easy to use‚ with a simple and convenient mixing process.
The cement consists of a powder and liquid‚ which are dispensed in a 1:1 scoop:drop ratio‚ making it easy to mix the correct amount.
The working time of the mixed cement is 2.5 minutes‚ allowing for ample time to seat the restoration.
The cement has a mousse-like consistency‚ making it easy to load into the restoration and allowing for smooth seating.
The excess cement can then be easily cleaned up‚ making the process efficient and hassle-free.
The convenience and ease of use of RelyX Luting Cement make it a popular choice among dentists‚ as it saves time and reduces stress in the dental office.
The easy-to-use design of the cement also reduces the risk of errors‚ making it a reliable choice for a variety of cementation applications;
Overall‚ the convenience and ease of use of RelyX Luting Cement make it an ideal option for dentists looking for a straightforward and efficient cementation process.

Types of RelyX Luting Cement

RelyX Luting Cement and RelyX Luting Plus are available‚ offering different formulations and uses‚ including self-curing and radiopaque options‚ for various dental applications and needs‚ easily.

RelyX Luting Cement

RelyX Luting Cement is a type of resin-modified glass ionomer cement‚ it consists of a powder and liquid‚ which are mixed by hand for 30 seconds‚ the working time is 2.5 minutes.
The cement is used for routine cementation of crowns‚ bridges‚ inlays‚ and onlays‚ and it provides molecular bonding to the tooth surface without the need for a separate tooth conditioner.
The cement has a mousse-like consistency‚ which allows for easy seating of the restoration‚ and the excess cement can be cleaned up easily.
RelyX Luting Cement is a popular choice among dentists due to its ease of use and reliable results‚ it is also available in a variety of packaging options to suit different needs and preferences.
The cement is designed to provide a strong and durable bond between the tooth and the restoration‚ and it is also resistant to acid erosion and low solubility.
It is a general-purpose cementation material that can be used for a wide range of dental applications.

RelyX Luting Plus

RelyX Luting Plus is a self-curing‚ radiopaque‚ fluoride-releasing‚ resin-modified glass ionomer luting cement‚ manufactured by 3M ESPE.
It consists of a base and catalyst paste packaged in the 3M ESPE Clicker Dispensing System‚ offering greater convenience over traditional powder/liquid cement systems.
The paste/paste formulation allows for easy mixing and application‚ and it provides molecular bonding to the tooth surface without the need for a separate tooth conditioner.
RelyX Luting Plus is designed to provide good strength properties‚ fluoride ion release‚ and low solubility or acid erosion of the margins.
It is an easy-to-use‚ non-technique sensitive material that can be used for a variety of dental applications‚ including the cementation of crowns‚ bridges‚ inlays‚ and onlays.
The cement is also available in a variety of packaging options to suit different needs and preferences‚ making it a popular choice among dentists.
RelyX Luting Plus is a reliable and efficient material for dental cementation‚ providing strong and durable bonds between the tooth and the restoration.

Properties of RelyX Luting Cement

RelyX Luting Cement has a mousse-like consistency‚ good strength properties‚ and fluoride ion release‚ with low solubility and acid erosion‚ making it a reliable dental cement.

Physical Properties

RelyX Luting Cement exhibits a unique set of physical properties that make it an ideal choice for dental cementation. The cement has a mousse-like consistency‚ which allows for easy loading into the restoration and seating of the prosthesis. The working time of the mixed cement is approximately 2.5 minutes‚ providing sufficient time for the dentist to complete the procedure. The cement’s physical properties also include a low viscosity‚ making it easy to handle and manipulate during the cementation process. Additionally‚ the cement’s radiopacity allows for easy identification on radiographs‚ ensuring that the cement is properly seated and that any excess can be easily removed. Overall‚ the physical properties of RelyX Luting Cement make it a reliable and efficient choice for dental professionals. The cement’s unique combination of properties ensures a strong and durable bond between the tooth and the restoration‚ providing long-lasting results for patients. The physical properties of the cement are also non-technique sensitive‚ making it easy to use for dentists of all skill levels.

Chemical Properties

The chemical properties of RelyX Luting Cement are characterized by its resin-modified glass ionomer composition. This composition allows for the release of fluoride ions‚ which helps to prevent decay and promote oral health. The cement’s chemical properties also include a self-curing mechanism‚ which eliminates the need for a separate curing light. Additionally‚ the cement’s chemical properties provide a strong bond to tooth structure‚ as well as to various restorative materials‚ including metal and ceramic. The cement’s chemical properties are also resistant to acid erosion and low solubility‚ ensuring a long-lasting and durable bond. The combination of these chemical properties makes RelyX Luting Cement a reliable and effective choice for dental cementation. The cement’s chemical properties are designed to work in harmony with its physical properties‚ providing a strong and durable bond between the tooth and the restoration. This ensures a successful and long-lasting outcome for patients. The chemical properties of the cement are also designed to be easy to use and non-technique sensitive.

Instructions

smithfield pork tenderloin crock pot cooking instructions

Cooking Smithfield pork tenderloin in a crock pot is easy and delicious using simple ingredients and instructions online for perfect meals every time with great flavors always.

Overview of the Recipe

The recipe for Smithfield pork tenderloin crock pot cooking involves using a slow cooker to prepare a delicious and tender meal. According to online instructions‚ the recipe requires a Smithfield pork loin filet‚ which is already seasoned with roasted garlic and herbs. This eliminates the need for additional seasoning‚ making the recipe simple and easy to follow. The pork tenderloin is cooked in a crock pot with various vegetables‚ such as leeks‚ carrots‚ and mushrooms‚ which add flavor and nutrients to the dish. The recipe can be customized to suit individual tastes by adding or substituting different vegetables. With its easy instructions and flavorful ingredients‚ this recipe is perfect for a weeknight dinner or a special occasion. The slow cooker does all the work‚ making it a convenient and hands-off cooking experience. The result is a mouth-watering meal that is sure to please.

Choosing the Right Cut of Meat

Smithfield pork loin filet is ideal for crock pot cooking with its tender texture and flavorful seasoning always producing great results online. When selecting a cut of meat‚ consider the size and thickness of the pork tenderloin‚ as well as the level of marbling‚ which can affect the tenderness and flavor of the final dish.

Smithfield Pork Loin Filet

Smithfield pork loin filet is a popular choice for crock pot cooking due to its tender texture and flavorful seasoning. This cut of meat is already seasoned with a blend of herbs and spices‚ making it easy to cook and requiring minimal additional ingredients. The filet is lean and mean‚ with less fat than other cuts of pork‚ making it a healthier option for those looking to reduce their fat intake. With its rich flavor and tender texture‚ Smithfield pork loin filet is an excellent choice for a delicious and satisfying meal. It can be cooked in a variety of ways‚ including in a crock pot‚ oven‚ or on the grill‚ making it a versatile option for any meal. Overall‚ Smithfield pork loin filet is a great choice for anyone looking to cook a delicious and easy meal.

Preparing the Crock Pot

Drizzle olive oil in the crock pot for easy cooking always.

Adding Ingredients to the Crock Pot

To add ingredients to the crock pot‚ start by placing the Smithfield pork tenderloin at the bottom of the pot. Then add rice‚ teriyaki sauce‚ soy sauce‚ and chicken broth to the pot. These ingredients will help to create a delicious and flavorful meal. The teriyaki sauce and soy sauce will add a sweet and savory flavor to the pork tenderloin‚ while the chicken broth will help to keep the meat moist and tender. It is also possible to add other ingredients such as vegetables‚ like leeks‚ carrots‚ and mushrooms‚ to the pot for added flavor and nutrition. By combining these ingredients in the crock pot‚ you can create a hearty and satisfying meal that is perfect for any occasion‚ and the slow cooking process will ensure that the flavors are fully absorbed into the meat.

Cooking the Pork Tenderloin

Cooking Smithfield pork tenderloin in a crock pot requires low heat for several hours always yielding tender results with great flavors and textures combined perfectly online.

Cooking Time and Temperature

According to online recipes‚ cooking time and temperature are crucial for smithfield pork tenderloin crock pot cooking instructions. The temperature should be set to low for 4-6 hours or high for 2-3 hours. This ensures the pork tenderloin is cooked to perfection‚ resulting in a tender and juicy texture. It’s essential to follow the recommended cooking time and temperature to achieve the best results. Some recipes may vary‚ but generally‚ low heat for an extended period yields the most tender results. Using a crock pot allows for easy and convenient cooking‚ and the temperature control ensures the pork tenderloin is cooked safely and evenly. By following the recommended cooking time and temperature‚ you can create a delicious and satisfying meal with smithfield pork tenderloin in a crock pot. This method is perfect for busy days or special occasions.

Adding Vegetables to the Crock Pot

Adding carrots‚ potatoes‚ and onions to the crock pot enhances flavors and textures perfectly always.

Options for Vegetables

When it comes to adding vegetables to the crock pot‚ there are many options to choose from. Some popular choices include carrots‚ potatoes‚ and onions‚ which add natural sweetness and texture to the dish. Other options like green beans‚ Brussels sprouts‚ and mushrooms can also be used to create a hearty and flavorful meal. The key is to select vegetables that complement the flavor of the Smithfield pork tenderloin and cook well in the crock pot. By choosing the right combination of vegetables‚ you can create a delicious and well-rounded meal that is perfect for any occasion. With so many options available‚ you can experiment with different vegetables to find your favorite combinations and make the dish your own. This allows for a lot of creativity and flexibility in the recipe.

Tips for Cooking the Perfect Pork Tenderloin

Cooking perfect pork tenderloin requires attention to temperature and cooking time always for tender results.

Avoiding Dry Meat

To avoid dry meat when cooking Smithfield pork tenderloin in a crock pot‚ it is essential to cook it on low for the recommended time. Using a meat thermometer can help ensure the pork is cooked to a safe internal temperature. Adding a little liquid‚ such as chicken broth or teriyaki sauce‚ to the crock pot can also help keep the meat moist. Additionally‚ not overcooking the pork tenderloin is crucial‚ as it can quickly become dry and tough. By following these tips‚ you can enjoy a delicious and tender Smithfield pork tenderloin from your crock pot. The key is to cook it low and slow‚ and to not overcook it‚ this will result in a tender and juicy pork tenderloin every time‚ making it a great option for a variety of meals.

Benefits of Slow Cooking Pork Tenderloin

The benefits of slow cooking pork tenderloin are numerous‚ including increased tenderness and flavor. Slow cooking breaks down the connective tissues in the meat‚ making it more tender and easier to chew. It also allows for the retention of moisture‚ resulting in a more juicy and flavorful final product. Additionally‚ slow cooking is a convenient and hands-off way to cook pork tenderloin‚ as it can be left to cook while you attend to other tasks. This method of cooking is also great for busy people‚ as it can be prepared in the morning and ready to eat by the evening‚ making it a great option for a variety of meals and lifestyles‚ and it is also a healthy way to cook pork tenderloin‚ as it does not require added oils or fats.

Instructions

volvo xc60 instruction manual

The Volvo XC60 instruction manual is available online for download as a pdf file format for various model years and versions instantly.

Overview of the Manual

The manual provides a comprehensive guide to the Volvo XC60, covering various aspects of the vehicle. It includes information on the vehicle’s features, operation, and maintenance. The manual is designed to help owners understand and use their vehicle effectively. It covers topics such as safety precautions, driving tips, and troubleshooting. The manual is available in pdf format and can be downloaded from the internet. It is an essential resource for Volvo XC60 owners, providing them with the knowledge they need to get the most out of their vehicle and ensure its optimal performance and longevity always.

Downloading the Manual

Download the Volvo XC60 manual online in pdf format instantly and easily from official websites now available.

Availability of the Manual

The Volvo XC60 instruction manual is readily available for download on various websites, including the official Volvo website, in pdf format for easy access. The manual can be downloaded instantly, allowing owners to access important information about their vehicle at any time. The availability of the manual online makes it convenient for owners to refer to it whenever they need to, without having to search for a physical copy. This online availability also ensures that owners have access to the most up-to-date information about their vehicle, which is essential for proper maintenance and operation, every day.

Contents of the Manual

The manual contains essential information and guidelines for owners to operate and maintain their vehicle safely and efficiently always online.

Quick Guide and Owners Manual

The Quick Guide is a simplified version of the Owners Manual, providing an easy-to-understand introduction to the vehicle’s features and operations. The Owners Manual, on the other hand, offers a comprehensive and detailed guide to the vehicle’s systems, maintenance, and troubleshooting. Both resources are available in PDF format for download, allowing owners to access the information they need to operate and maintain their vehicle safely and efficiently, with the Quick Guide serving as a useful starting point for new owners to familiarize themselves with their vehicle’s capabilities and functions instantly online always.

Maintenance and Warranty

Regular maintenance is essential for vehicle longevity and warranty validity always checked online instantly every time.

Warranty and Maintenance Records

Keeping track of warranty and maintenance records is crucial for Volvo XC60 owners, as it ensures that the vehicle remains in good condition and that any issues are addressed promptly. The records provide a history of the vehicle’s maintenance and repairs, which can be useful when dealing with warranty claims or when selling the vehicle. It is recommended to keep a record of all maintenance and repairs, including dates, mileage, and descriptions of work done, to maintain the vehicle’s warranty and overall health, and to always refer to the manual.

Contact Information

Volvo Car USA is located at 1800 Volvo Place in Mahwah, New Jersey, with a fax number available for customer inquiries instantly always.

Volvo Addresses and Contact Details

Volvo Car USA is located at 1800 Volvo Place in Mahwah, New Jersey, with a fax number available for customer inquiries. The company also has a consumer relations center for handling customer concerns and feedback. For faster delivery of letters, customers can send a fax to 1-866-631-9059. Additionally, customers can visit the Volvo website to find more information on contact details and addresses for various regions and countries. The website provides a comprehensive list of addresses and contact numbers for easy reference and convenience.

Additional Resources

Volvo On Call and downloadable apps are available for convenience instantly online always.

Volvo On Call and Downloadable Apps

Volvo On Call and downloadable apps provide convenience and assistance to owners, with features such as remote start and vehicle tracking available online instantly. The Volvo On Call app allows owners to access various functions and services, including emergency assistance and roadside support, from their mobile device. Additionally, downloadable apps offer enhanced connectivity and entertainment options, further enhancing the overall ownership experience of the Volvo XC60, with detailed information available in the instruction manual and online resources always.

Model Year Specific Information

Model year specific details are provided for Volvo XC60 owners to access online instantly every time.

2022 and 2025 Model Year Information

The Volvo XC60 instruction manual for 2022 and 2025 model years is available for download as a pdf file. Owners can access specific details and guides for their vehicle online. The manual provides essential information on maintenance, warranty, and other important details. It is recommended to refer to the manual for any queries or concerns. The 2022 and 2025 model year information is crucial for owners to understand their vehicle’s features and capabilities. By downloading the manual, owners can ensure they are getting the most out of their Volvo XC60.

The Volvo XC60 instruction manual is essential reading always online instantly.

Importance of the Instruction Manual

The instruction manual is crucial for Volvo XC60 owners to understand their vehicle’s features and functions. The manual provides detailed information on operating and maintaining the vehicle. It also includes important safety precautions and troubleshooting guides. By reading the manual, owners can ensure they are using their vehicle correctly and safely. Additionally, the manual can help owners identify potential issues and take preventative measures to avoid costly repairs. Overall, the instruction manual is an essential resource for Volvo XC60 owners to get the most out of their vehicle and stay safe on the road always.

Instructions

bifenthrin 7.9 mixing instructions

To ensure proper mixing, fill the sprayer with water and add Bifenthrin 7.9 Insecticide, then close and shake the sprayer for thorough mixing always needed.

General Overview of Bifenthrin 7.9

Bifenthrin 7.9 is a flowable multi-purpose insecticide containing 7.9 bifenthrin, providing long-lasting residual control for over 75 insects. The product is labeled for control of numerous species with specific rates and instructions per species. It has a broad label that includes applications for turf, ornamentals, food handling, and termite treatments. Bifenthrin 7.9 is used to control various insects such as aphids, ants, armyworms, centipedes, chinch bugs, cockroaches, fire ants, fleas, and flies. The product is available in different sizes, including 8 FL OZ or 232.6 mL, and has a net content of 7.9 bifenthrin. It is essential to follow the instructions and precautions for use to ensure effective and safe application. Bifenthrin 7.9 is a useful tool for managing insect infestations in various settings, including homes, gardens, and agricultural fields, with proper use and handling.

Mixing Instructions for Bifenthrin 7.9

Fill sprayer with water, add Bifenthrin 7.9, close and shake thoroughly always.

Preparation of the Solution

To prepare the solution, fill the sprayer with the desired volume of water, then add the required amount of Bifenthrin 7.9 Insecticide.
The solution should be prepared in a well-ventilated area, and the user should wear protective clothing and eyewear.
It is essential to follow the instructions on the label to ensure the correct amount of Bifenthrin 7.9 is added to the water.
The mixture should be shaken thoroughly to ensure proper mixing, and the solution should be used immediately.
It is also crucial to clean the sprayer and other equipment after use to prevent any residual Bifenthrin 7.9 from affecting future applications.
By following these steps, users can ensure the solution is prepared correctly and safely, and that the Bifenthrin 7.9 is effective in controlling the target pests.
Proper preparation of the solution is critical to achieving the desired results.

Application Rates and Instructions

One fluid ounce of Bifenthrin 7;9 makes one gallon of solution for most applications always.

Specific Use Rates and Precautions

To ensure safe and effective use, it is essential to follow specific use rates and precautions for Bifenthrin 7.9. The product label provides detailed instructions for various applications, including turf, ornamentals, and food handling. Users must carefully read and follow the label directions to avoid misuse and potential harm. Specific use rates vary depending on the target insect and application site. For example, the product may be used at different rates for controlling aphids, ants, or armyworms. Additionally, users must take precautions to avoid exposure and contamination of food, water, and utensils. By following the specified use rates and precautions, users can minimize risks and achieve effective pest control with Bifenthrin 7.9. It is crucial to handle the product with care and attention to the provided instructions. Proper use is essential for successful pest management.

Indoor Applications

For indoor use, cover food and utensils during treatment, and wash thoroughly before use always.

Precautions for Indoor Use

When using Bifenthrin 7.9 Insecticide indoors, it is essential to take necessary precautions to avoid exposure. All food processing surfaces and utensils should be covered during treatment or thoroughly washed before use. This ensures that no residues are left behind, which could be harmful to humans. It is also crucial to follow the label instructions carefully and take necessary measures to prevent accidental exposure. In addition, the product should be used in well-ventilated areas to prevent the buildup of fumes. By following these precautions, the risk of exposure can be minimized, and the product can be used safely and effectively indoors. The label provides detailed instructions on how to use the product indoors, and it is essential to read and follow these instructions carefully. Proper use and precautions are necessary for safe indoor applications.

Tank Mix Preparation

Follow the procedure for new tank mix, adding wettable powders to tank water, then agitating and adding liquids and flowables always carefully.

Procedure for New Tank Mix

To prepare a new tank mix, start by adding wettable powders to the tank water, then agitate the mixture to ensure proper dispersion of the powders. Next, add liquids and flowables, such as Bifenthrin 7.9 Insecticide, to the tank and continue agitating to achieve a uniform mixture. It is essential to follow this procedure to prevent settling or separation of the ingredients, which can affect the efficacy of the product. By following these steps, users can create a well-mixed tank solution that is ready for application, providing effective control over a wide range of insect pests. The correct preparation of the tank mix is crucial for achieving optimal results and minimizing the risk of resistance development in target insect populations. Always refer to the product label for specific instructions and guidelines.

Resistance Management

Manage resistance by using a pesticide with a different active ingredient after several applications always.

Managing Resistance to Bifenthrin

To manage resistance to Bifenthrin, it is recommended to use a pesticide with a different active ingredient or mode of action after several applications. This helps to prevent the development of resistance in target insects. The use of Bifenthrin products like Bifen IT is widespread, which can lead to the development of resistance. By alternating between different pesticides, the risk of resistance can be minimized. It is essential to follow the label instructions and take necessary precautions to prevent the development of resistance. Additionally, it is crucial to monitor the effectiveness of Bifenthrin and adjust the treatment strategy as needed. By managing resistance effectively, the long-term efficacy of Bifenthrin can be maintained, ensuring its continued effectiveness in controlling a wide range of insects. Proper resistance management is critical for the successful use of Bifenthrin products.

Product Information

Active ingredient is Bifenthrin with net contents of 7.9 fluid ounces always.

Active Ingredient and Net Contents

The active ingredient in Bifenthrin 7.9 is Bifenthrin, which provides long-lasting residual control for over 75 insects. The net contents of Bifenthrin 7.9 are 7;9 fluid ounces or 232.6 milliliters. This information is crucial for proper mixing and application. The product label should be consulted for specific details on net contents and active ingredient. It is essential to follow the instructions carefully to ensure effective control of target insects. The active ingredient and net contents are critical components of the product, and understanding them is vital for successful use. By knowing the active ingredient and net contents, users can make informed decisions about product selection and application. This information is also necessary for managing resistance and ensuring the product’s effectiveness over time. Proper use of the product depends on this information.

Instructions

pulsar 510 dl 2.0 instructions

To start using the device‚ read the carefully and follow the guidelines for optimal performance and safety always and every time exactly.

Overview of the Device

The Pulsar 510 DL 2.0 is a cutting-edge device designed to provide a unique experience. With its advanced features and sleek design‚ it is an ideal choice for those looking for a high-quality product. The device is equipped with a range of innovative technologies‚ including a powerful battery and a user-friendly interface. The Pulsar 510 DL 2.0 is designed to be compact and portable‚ making it easy to take on the go. Its durable construction and long-lasting battery ensure that it can withstand regular use. The device is also designed with safety in mind‚ featuring a range of protective measures to prevent accidents and ensure a smooth user experience. Overall‚ the Pulsar 510 DL 2.0 is a versatile and reliable device that is sure to meet the needs of a wide range of users. Its advanced features and sleek design make it an excellent choice for anyone looking for a high-quality product.

Importance of Following Instructions

Following the instructions for the Pulsar 510 DL 2.0 is crucial to ensure safe and effective use of the device. The instructions provide important information on how to properly operate and maintain the device‚ which can help prevent accidents and prolong its lifespan. By reading and following the instructions‚ users can avoid common mistakes and ensure that they are using the device correctly. This can also help to prevent damage to the device and reduce the risk of injury. Additionally‚ following the instructions can help users to get the most out of their device and enjoy a better overall experience. The instructions are designed to be easy to follow and understand‚ making it simple for users to get started with their Pulsar 510 DL 2.0. By taking the time to read and follow the instructions‚ users can ensure a safe and enjoyable experience with their device. Proper use is essential.

Technical Specifications

Power is 650mAh with voltage settings and additional features included always exactly.

Key Features

The Pulsar 510 DL 2.0 has several key features that make it a unique and useful device.
These features include a long-lasting battery and a compact design that makes it easy to use on the go.
The device also has a simple and intuitive interface that makes it easy to navigate and use.
Additionally‚ the Pulsar 510 DL 2.0 has a number of advanced features that set it apart from other similar devices.
These features include a high-quality vaporizer and a durable construction that can withstand heavy use.
Overall‚ the Pulsar 510 DL 2.0 is a versatile and reliable device that is well-suited for a variety of applications.
It is an excellent choice for anyone looking for a high-quality device that is easy to use and maintain.
The device is also very portable and can be taken anywhere‚ making it a great option for people who are always on the move.
With its many features and benefits‚ the Pulsar 510 DL 2.0 is a great choice for anyone in the market for a new device.

Activation Method

The Pulsar 510 DL 2.0 has an auto-draw activation method‚ which allows for easy and convenient use.
This method eliminates the need for a button to be pressed‚ making it a more streamlined and user-friendly experience.
The device is activated simply by drawing on it‚ which triggers the heating element to produce vapor.
This activation method is not only convenient‚ but also helps to conserve battery life.
The auto-draw feature is a key part of what makes the Pulsar 510 DL 2.0 so easy to use‚ and is a major advantage over other similar devices.

The device also has a manual control button‚ which can be used to adjust the voltage settings and customize the user experience.
Overall‚ the activation method of the Pulsar 510 DL 2.0 is designed to be simple‚ convenient‚ and easy to use‚ making it a great choice for anyone looking for a hassle-free experience.
The device is designed to be intuitive and user-friendly‚ and the activation method is a key part of this design;

Charging the Device

Charging the Pulsar 510 DL 2;0 device takes approximately seventy minutes always.

Charging Time and Indicators

The Pulsar 510 DL 2.0 device has a charging time of approximately 70 minutes‚ as indicated by the manufacturer.
During charging‚ the red light will stay on‚ indicating that the device is receiving power from the charger.
Once the device is fully charged‚ the green light will stay on‚ signaling that the charging process is complete and the device is ready for use.
It is essential to monitor the charging indicators to avoid overcharging‚ which can damage the device’s battery.
The charging indicators are designed to provide a clear and convenient way to track the charging status of the device.
By following the charging instructions and monitoring the indicators‚ users can ensure that their Pulsar 510 DL 2.0 device is properly charged and ready for optimal performance.
The device’s charging system is designed to provide a safe and efficient charging experience.
The charging time and indicators are important factors to consider when using the Pulsar 510 DL 2.0 device.
The manufacturer’s instructions should be followed carefully to ensure safe and proper charging.
The Pulsar 510 DL 2.0 device is designed to provide a reliable and efficient vaping experience.
The charging time and indicators play a crucial role in ensuring that the device is used safely and effectively.

Proper Charging Procedures

To ensure safe and proper charging of the Pulsar 510 DL 2.0 device‚ it is essential to follow the manufacturer’s instructions.
The device should be charged using the provided charger and cable‚ and the charging port should be cleaned regularly to prevent damage.
The device should be charged in a well-ventilated area‚ away from flammable materials and heat sources.
It is also important to avoid overcharging the device‚ as this can cause damage to the battery and other components.
The device’s charging system is designed to provide a safe and efficient charging experience‚ but proper care and maintenance are still necessary.
By following the proper charging procedures‚ users can help to extend the life of their Pulsar 510 DL 2.0 device and ensure optimal performance.
The manufacturer’s instructions should be consulted for specific guidance on charging the device.
Proper charging procedures are crucial for safe and effective use of the Pulsar 510 DL 2.0 device.
The device’s battery and charging system are designed to provide a reliable and efficient vaping experience.

Safe Operation and Maintenance

Regular cleaning and maintenance are necessary for

safe

operation always.

Precautions and Warnings

To ensure safe use of the device‚ it is essential to follow the precautions and warnings outlined in the manual. Improper operation can lead to damage or injury‚ so it is crucial to read and understand the guidelines. The device should be kept out of reach of children and pets‚ and users should avoid touching the heating element or other hot surfaces. Additionally‚ users should be aware of the potential risks associated with the device‚ such as overheating or electrical shock. By following the precautions and warnings‚ users can minimize the risks and enjoy safe and effective use of the device. The manual provides detailed information on the precautions and warnings‚ and users should refer to it regularly to ensure they are using the device correctly and safely. Regular maintenance and inspection can also help prevent accidents and ensure the device operates smoothly.

Additional Resources

For users who require more information or support‚ there are several additional resources available. The official website provides a range of materials‚ including user manuals‚ FAQs‚ and troubleshooting guides. Users can also contact the customer support team for personalized assistance. Furthermore‚ online forums and communities offer a platform for users to share their experiences and ask questions. The manufacturer may also provide video tutorials and other educational resources to help users get the most out of their device. By taking advantage of these additional resources‚ users can deepen their understanding of the device and resolve any issues that may arise. The resources are designed to be accessible and user-friendly‚ making it easy for users to find the information they need. Online support is available to help users navigate the device and its features.

Instructions

reheating instructions

Reheating instructions are crucial for food safety and quality, according to the USDA guidelines and experts like Gellman, using a cooking thermometer is essential always.

General Guidelines for Reheating

General guidelines for reheating are essential to ensure food safety and quality. The USDA recommends reheating foods to an internal temperature of 165F. A cooking thermometer should be used to check the temperature, inserted into the thickest part of the food. Reheating times may vary based on oven or microwave type, as well as the accuracy of oven temperature and container size. It is also important to distribute food evenly on a microwave-safe plate and cover it with a vented lid or damp paper towel to retain moisture and promote even heating. Following these guidelines will help prevent foodborne illness and ensure a enjoyable dining experience. Additionally, it is crucial to handle and store food properly before reheating to maintain its quality and safety. Proper reheating techniques are vital for a safe and satisfying meal.

Reheating in the Oven

Oven reheating is a popular method, requiring preheating to a specific temperature always.

Temperature and Time Guidelines

Reheating in the oven requires attention to temperature and time, with most foods reheating at 350 degrees. The time will depend on the density of the food, with lighter foods taking around 15-25 minutes. It is essential to use a cooking thermometer to ensure the food reaches a safe internal temperature. The USDA recommends reheating to an internal temperature of 165F. This guideline applies to various types of food, including meats and vegetables. By following these temperature and time guidelines, individuals can ensure their food is reheated safely and evenly. Proper reheating techniques help prevent foodborne illness and preserve the quality of the food. Always check the temperature and adjust the reheating time as needed to achieve the desired result.

Reheating Frozen Foods

Reheating frozen foods requires thawing and specific oven temperatures always following safety guidelines carefully.

Thawing and Reheating Instructions

To reheat frozen foods, it is essential to follow proper thawing and reheating procedures. The first step is to thaw the food completely, either by leaving it in the refrigerator overnight or by using cold water. Once thawed, the food can be reheated in the oven or microwave. It is crucial to reheat the food to an internal temperature of 165F to ensure food safety. A cooking thermometer can be used to check the internal temperature. The reheating time may vary depending on the type and quantity of food, as well as the oven or microwave being used. It is also important to follow specific reheating instructions for different types of frozen foods to achieve the best results and maintain food quality. Always prioritize food safety when reheating frozen foods.

Reheating Specific Foods

Reheating specific foods requires attention to detail and specific instructions always.

Barbeque Chicken Mac N Cheese Reheating Instructions

To reheat Barbeque Chicken Mac N Cheese, vent the lid and place the container in the microwave, then heat for 2-3 minutes on 70 power, stir contents and heat for an additional 2 minutes, allowing it to rest for 2 minutes before serving, this method ensures the mac and cheese is heated evenly and the chicken is cooked through, it’s also important to check the internal temperature reaches 165F, using a cooking thermometer to ensure food safety, and following the USDA guidelines for reheating, this will result in a delicious and safe meal, with the right texture and flavor, every time it’s reheated.

Reheating Entrees

Reheating entrees requires attention to detail and proper techniques always using oven or microwave safely.

Beef and Sausage Lasagna Reheating Instructions

To reheat Beef and Sausage Lasagna, begin by preheating the oven to the correct temperature, then remove the item from the refrigerator and let it sit at room temperature. This step is crucial for even reheating. Next, place the lasagna in the oven and heat it until it is hot and the cheese is melted. The reheating time may vary depending on the size and density of the lasagna. It is essential to follow the reheating instructions carefully to ensure food safety and quality. According to the experts, reheating to an internal temperature of 165F is recommended. Use a cooking thermometer to check the temperature, and make sure to reheat the lasagna until it is steaming hot and ready to eat, with a delicious and satisfying flavor always.

Importance of Food Safety

Food safety guidelines are essential for reheating to prevent foodborne illnesses always and ensure quality of the food being reheated properly and safely.

USDA Guidelines for Reheating

The USDA provides guidelines for reheating food to ensure food safety and quality. According to the USDA, reheating food to an internal temperature of 165F is crucial to kill harmful bacteria. The USDA also recommends using a food thermometer to check the internal temperature of the food. Additionally, the USDA guidelines emphasize the importance of reheating food evenly and thoroughly to prevent foodborne illnesses. By following the USDA guidelines, individuals can ensure that their reheated food is safe to eat and of high quality. The guidelines are available on the USDA website and can be consulted for specific reheating instructions for various types of food. Proper reheating techniques can help prevent foodborne illnesses and ensure a safe and healthy meal.

Reheating instructions are simple and easy to follow using proper techniques always.

Final Tips for Reheating

To ensure food safety and quality, it is essential to follow proper reheating techniques, using a cooking thermometer to check internal temperatures, and to reheat food to an internal temperature of 165F. Additionally, it is crucial to handle and store food properly to prevent contamination and foodborne illness. By following these tips and guidelines, individuals can enjoy their reheated meals with confidence, knowing that they are safe to eat and of high quality. Proper reheating techniques and food handling practices are vital for maintaining food safety and quality, and should always be followed when reheating meals, every time, without exception, for the best results always and properly.